 Scis
ScisThe interface
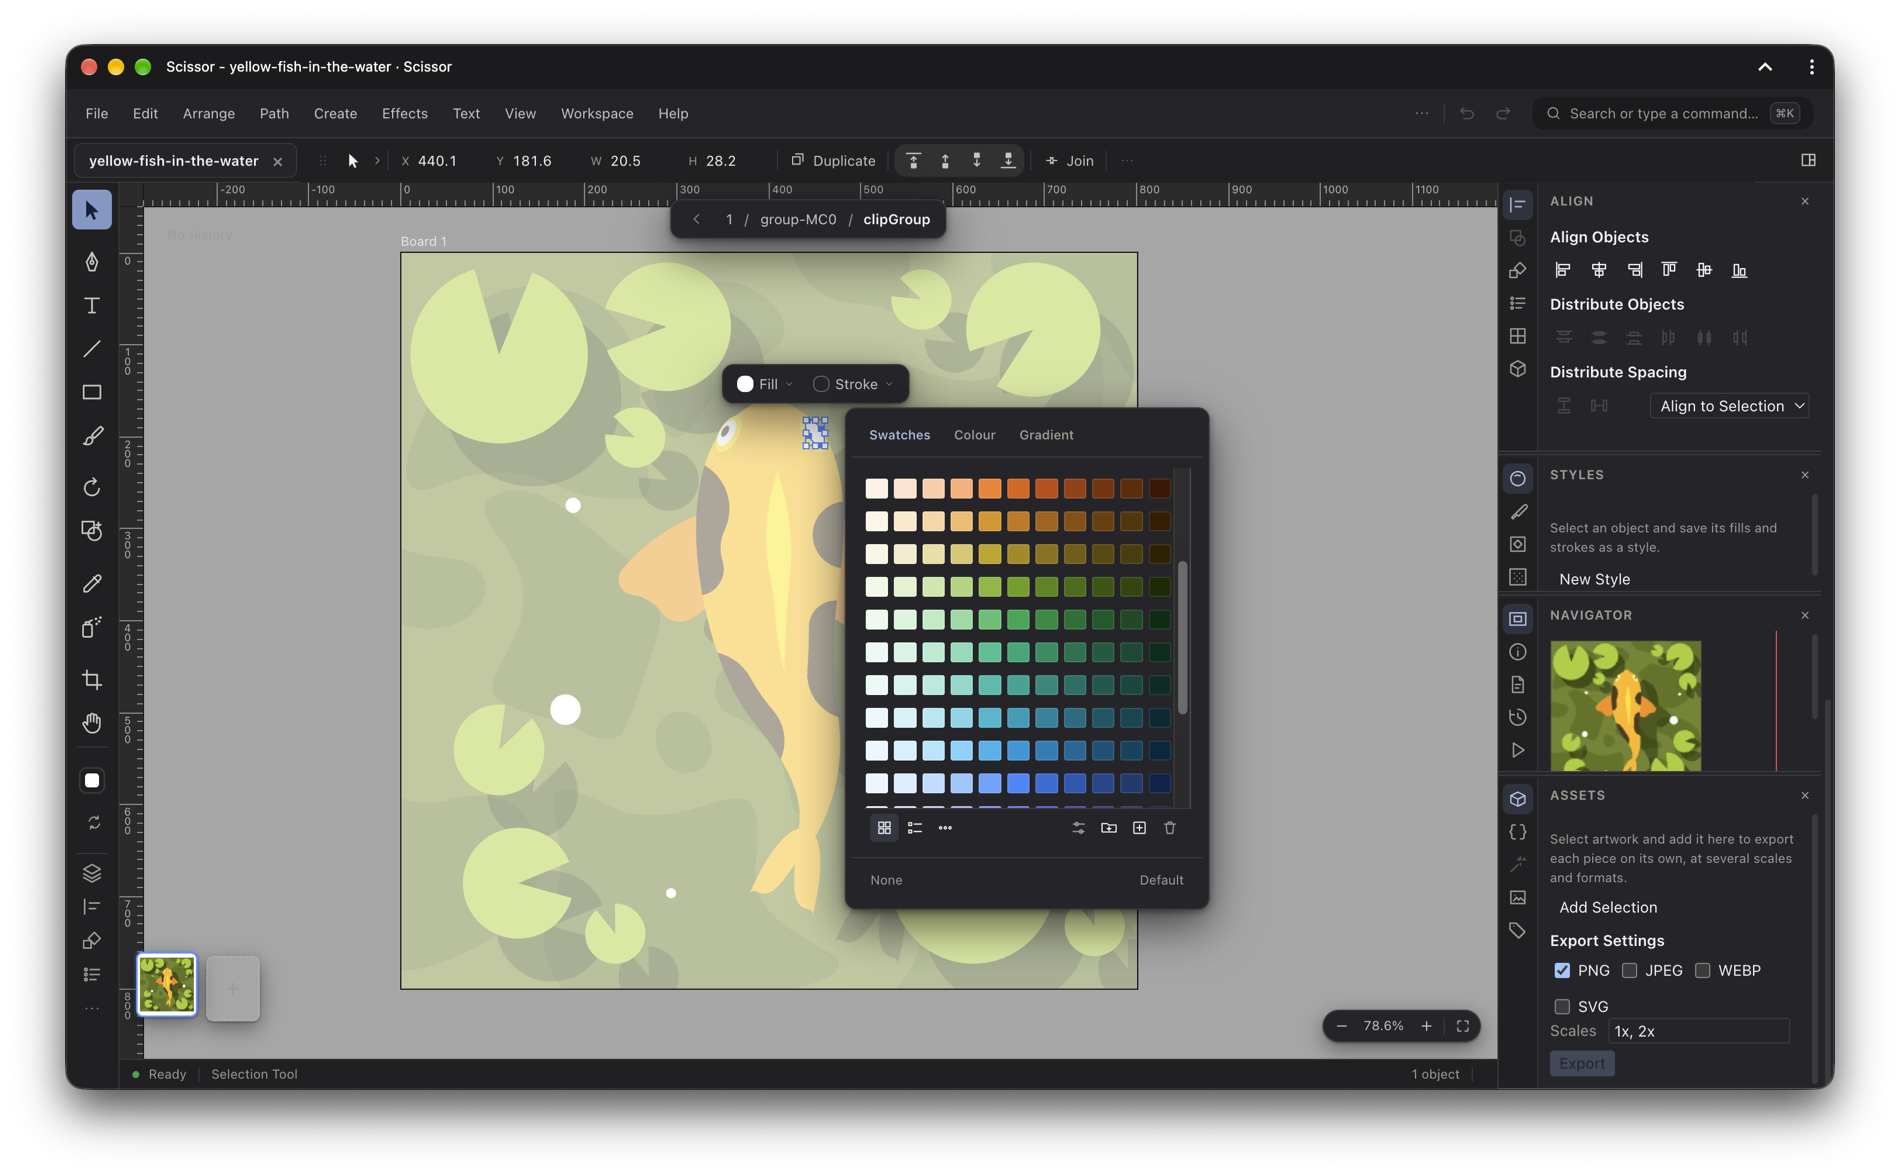
Scissor fills the browser window with a single editing surface: a menu bar across the top, a control bar and document tabs beneath it, the tool palette down the left, the drawing canvas in the middle, and the panel dock on the right. Everything runs on your own machine, so a document stays where you put it and nothing is sent away to be opened.
Shortcuts on this page are written in the macOS form. On Windows and Linux, read ⌘ as Ctrl and ⌥ as Alt; ⇧ is Shift and ⌃ is Control.
The workspace at a glance
The window is built from a few regions that each answer a different question. Learn where they are once and the rest of the manual reads more easily.
- Menu bar
- The row of menus along the very top, with undo and redo and a command search at its right end. This is the full list of everything the editor can do.
- Control bar
- The strip just below the menus. It shows the current tool and the handful of controls that matter for whatever you have selected right now.
- Document tabs
- To the left of the control bar, one tab per open document. The panels button sits at the far right of the same row.
- Tool palette
- The narrow column of tools down the left edge, with the fill and stroke control at its foot.
- Canvas and pasteboard
- The large area in the middle where you draw. The white rectangles are boards; the grey surround is the pasteboard.
- Panel dock
- The column of panels on the right. It slides in over the canvas when you need it and gives the room back when you close it.
- Status bar
- The thin line along the foot of the window, reporting the current tool, the selection and the last undoable action.

The menu bar
Ten menus run along the top. They gather every command in the program, grouped by the kind of work you are doing rather than by where a feature happens to live inside the engine.
| Menu | What it holds |
|---|---|
| File | New, open, close, save, place, export, scripts, document setup and print. |
| Edit | Undo and redo, the clipboard commands, the whole Select menu as a submenu, colour editing, and Preferences. |
| Arrange | Transform, stacking order, alignment, grouping, and locking and hiding. |
| Path | Path and compound-path commands, morph, Shape Warp and perspective, clipping masks, text wrap and expanding. |
| Create | Patterns, repeats, Region Fill, Vectorize, gradient mesh, boards, slices and the pixel-layer commands. |
| Effects | Live effects: the vector set (3D, distort and transform, Combine Shapes, stylize, warp and more) and a Raster submenu below them. |
| Text | Font, size and glyphs, create outlines, change case, text flow and character insertion. |
| View | Appearance (light and dark), outline and pixel preview, zoom, rotate view, rulers, guides, the grid and snapping. |
| Workspace | The panels: the six you open most, a Type submenu, a More Panels submenu for the rest, and Reset Panels. |
| Help | What’s New, the user manual, install, the Terms of Use and About, with a search field at the top. |
A tick beside an item means that setting is on. An item drawn in grey cannot be used at the moment, usually because nothing is selected or no document is open. Where a command has a shortcut, it is shown down the right side of the menu.
Finding a command
You do not have to remember which menu holds what. The search button at the right of the menu bar, labelled Search or type a command, opens the command palette; ⌘K opens it from the keyboard. Type a few letters and it lists every matching command with its menu path and shortcut, and every matching tool. Use ↑ and ↓ to move through the results, Enter to run the highlighted one, and Esc to close. Reach for this when you know what you want but not where it is, or when a shortcut is faster to type than to hunt for. The Help menu carries its own search field that does the same across the menus.
Undo and redo
The curved arrows near the right of the menu bar undo and redo, the same as ⌘Z and ⇧⌘Z. Each button names the step it would reverse when you hover it, and the status bar shows the same at the foot of the window, so you can always see what one more press would undo.
The tool palette
The tools sit in a single column down the left edge. They are arranged into families: Select, Draw, Type, Line, Shape, Paint, Reshape, Build, Sample, Symbols, Boards and View. The column shows one tool from each family at a time; rest the pointer on a slot and the rest of that family fans out to the right, so you can pick a sibling without the column shifting under your hand. A slot keeps showing whichever member of its family you last used.
Click a slot to choose the tool it shows. Its tooltip gives the tool's name and its single-key shortcut, for example V for the Selection tool, P for the Pen or T for Type. When you switch tools with the keyboard, the matching slot lights up for a moment so you can see which one is now active. To see everything at once, a button near the command search, drawn as three dots, opens a browser of every tool, grouped by family and filtered as you type.
Fill and stroke
Below the tools is the fill and stroke control: a filled square for the fill, set inside a band that stands for the stroke, with a small pair of arrows to swap them. Because it sits here rather than only in the control bar, you can choose a colour before you pick a tool, and it becomes what the next object is drawn with. Click the fill or the band to open the colour, swatches and gradient tabs.
| Key | Action |
|---|---|
| X | Move focus between fill and stroke |
| ⇧X | Swap the fill and the stroke |
| D | Return to the default: white fill, black stroke |
| / | Set the active side to none |
Panels beside the rail
Between the fill and stroke control and the tools, the palette offers a short row of panel buttons chosen for the tool you are holding: the drawing tools bring the swatches and stroke panels within reach, the type tools bring the type and paragraph panels, and so on. These open a single panel right where your hand already is. A further button opens the full dock. On a short window the row folds into one Panels button that lists the same choices, so the palette never runs off the bottom edge.
The control bar
The strip under the menus changes with what you are doing. It names the current tool at its left, and to the right it shows only the controls that can act on the current selection: the fill, stroke and stroke weight; the X, Y, W and H of the selection; and the actions that make sense, such as align, the boolean shape modes, stacking order, group, ungroup and duplicate. When there is more than fits, a final button collects the rest into a menu, so the bar never reflows as you use it.
Type into any number field and press Enter, or leave the field, to apply the value; ↑ and ↓ step it, with ⇧ for ten times the step and ⌥ for a tenth. The small label beside a field is a scrubber: drag it left or right to change the value by feel. Hover the tool's name to reveal that tool's first few options; click the name to open its full options below the bar, with all its switches and numbers.
The control bar is docked in the tabs row by default, but you can drag its handle to float it over the canvas, and double-click the handle (or use its dock button) to put it back. Alongside it, a compact bar can appear next to a selected object carrying just its fill, stroke and weight, so colour is right beside the artwork rather than across the window.
The canvas and pasteboard
The middle of the window is the canvas. Boards are the white rectangles that hold the artwork you mean to keep; the grey surround is the pasteboard. The pasteboard is part of the document, so a sketch, an offcut or a colour test parked there is saved with the file, but when you export a board only what falls inside that board's rectangle is written out.
Panning and zooming
Hold Space to switch to the Hand tool for as long as you hold it, then drag to pan; let go and your tool comes back. Dragging with the middle mouse button pans as well. The wheel scrolls, and the wheel with ⌘ or ⌥ held zooms about the pointer.
| Shortcut | Zoom |
|---|---|
| ⌘= / ⌘- | In and out |
| ⌘0 | Fit the active board in the window |
| ⌥⌘0 | Fit all boards in the window |
| ⌘1 | Actual size |
A zoom control sits over the canvas with minus, plus and fit buttons and the current percentage; click the percentage for the same fit and actual-size commands as a menu.
Rulers and guides
⌘R shows and hides the rulers, which measure in the document's units from the top left corner of the active board and carry a marker that follows the pointer. Drag out of a ruler to pull a guide onto the artwork, and drop a guide back on a ruler to be rid of it. You can also turn a selected path into a guide with Make Guides (⌘5) and turn it back with Release Guides (⌥⌘5). Show or hide all guides with ⌘;. Smart Guides (⌘U) show alignment and measurement hints as you draw and drag.
The grid
The grid is drawn per board and set from View › Grid or from the Grid panel. Show or hide it with ⌘' and toggle snapping to it with ⇧⌘'. Each board can use one of six kinds of grid: Orthogonal, Isometric, Hexagonal, Oblique, Golden Ratio and Perspective. Choosing a kind turns the grid on so you can see it at once. The grid is described in full on its own page.
The history strip
A column of small ticks appears in a corner of the canvas when you move the pointer near it: this is the document's history. Hover a tick to name that step, click one to walk straight there, or press and slide down the ticks to run the document backwards and forwards so you can watch a change come and go. The History panel in the dock lists the same steps as text.
Boards and the board strip
Boards are what Scissor calls artboards. Each carries its name above its top left corner, and the active board is drawn with a stronger frame than the rest. If a board has a bleed, it is shown around it as a red dashed rectangle. Add one from Create › Boards › New Board, draw and reshape boards with the Board tool (⇧O), and set a board's size and name in Board Options. Rearrange All Boards tidies them into a row.
A strip of board thumbnails sits over the canvas, one small preview per board plus an add button at the end. Click a thumbnail to make that board active and fit it in the window; click the name under it to jump to that board and pick up the Board tool ready to edit it. The Boards panel in the dock lists them as well.
Document tabs
Open documents appear as tabs to the left of the control bar. A tab shows the document's name, with a dot in front of it while it has unsaved changes. Click a tab to switch to that document, or the × to close it; closing a document with unsaved work asks first. Middle-click a tab to close it straight away, and drag a tab onto another to reorder the open documents. New (⌥⌘N), Open (⌘O) and Save (⌘S) live in the File menu, and Close is ⌥⌘W.
The tabs sit across the top by default. To dock them down the side instead, turn on View › Document Tabs on Side (also in Preferences); the side strip can be dragged wider or narrower by its right edge, and the choice is remembered.
The status bar
The line along the foot of the window reports, from left to right: a ready indicator, the name of the current tool, the size of the selection (nothing selected, one object, or a count), and the action that ⌘Z would undo. It is a quiet place to confirm what you have picked up and what the next undo will reverse.
The panel dock
Panels live in the column on the right. At rest the canvas has the whole window; asking for a panel slides the dock in over the canvas, and closing it gives the room straight back. The panels button at the right of the tabs row, and the Escape key, open and close the dock; the Window and Workspace menus and the command palette open a specific panel.
The docked panel groups
Panels are stacked in groups, each group a column of small icon tabs down its own edge. Rest the pointer on a tab to see the panel's name, and the open panel names itself above its contents. By default the groups gather panels that tend to be used together:
- Properties, Layers, Boards, Grid: the document's structure.
- Color, Swatches, Gradient, Stroke: how things are painted.
- Type, Paragraph, Glyphs: text.
- Align, Combine Shapes, Transform, Paint Stack, Transparency, 3D: shaping and arranging.
- Styles, Brushes, Symbols, Patterns: reusable looks and objects.
- Navigator, Info, Document Info, History, Actions: moving around and measuring.
- Assets, Variables, Auto-Select, Vectorize, Attributes: the rest.
Rearranging panels
The layout is yours to change. Drag a tab along its own strip to reorder it, drag it onto another group's strip to move it there, or drag it clear of the dock to leave it floating over the canvas. Drag the empty part of a strip to lift a whole group out, and drop it back over the dock to put it home; a gap between groups accepts a dropped tab as a new group of its own. Right-click a tab for the same moves by menu, including Close Panel. The × at the top of a strip closes that group, and dragging the divider between two groups gives height to one and takes it from the other. A floating group can be resized from its corner.
Panels that wait for something to do
A panel that has nothing to act on right now does not vanish: its tab stays, only dimmed, and its body shows a line saying what it is waiting for, such as selecting an object or picking the Type tool. So that the dock does not reshuffle under your hand, this waiting is held while the pointer is inside the dock and catches up once the pointer leaves.
Opening, hiding and resetting panels
Open a panel from the Workspace menu, where the six most-used sit at the top and the rest are under More Panels, or from the Window menu in the classic chrome. Many panels have a shortcut:
| Panel | Shortcut | Panel | Shortcut |
|---|---|---|---|
| Layers | F7 | Colour | F6 |
| Paint Stack | ⇧F6 | Info | F8 |
| Align | ⇧F7 | Transform | ⇧F8 |
| Stroke | ⌘F10 | Gradient | ⌘F9 |
| Combine Shapes | ⇧⌘F9 | Transparency | ⇧⌘F10 |
| Graphic Styles | ⇧F5 | Brushes | F5 |
| Attributes | ⌘F11 | Symbols | ⇧⌘F11 |
| Character | ⌘T | Paragraph | ⌥⌘T |
| Glyphs | ⌥⇧F11 |
The dock can be widened by dragging its left edge, from a comfortable two-fields-to-a-row width up to a good deal wider. Your arrangement, and how wide you left the dock, are remembered between sessions. When the dock is closed, sweeping the pointer to the right edge of the window peeks it out, as long as there is no artwork under the pointer. To undo all your changes to the layout, choose Reset Panels, which puts every group back to its starting place.
Tab hides the tool palette, the control bar, the document tabs, the status bar, the panels and the other on-canvas chrome so that only the artwork and the menu bar are left; press it again to bring them all back.
Light and dark
Scissor follows your system setting for light and dark. To fix it one way, choose View › Appearance and pick System, Light or Dark. The choice is remembered, and it carries through to the canvas as well as the chrome: the pasteboard, the rulers and the board labels are all drawn to suit the theme you are in.